Ceiling fans may appear simple, but installing them correctly requires careful electrical and structural planning. A poorly installed fan can wobble, make noise, strain wiring, or even fall, posing safety risks to occupants. Electricians approach ceiling fan installation with attention to load support, wiring integrity, and long-term performance. Their process ensures the fan operates smoothly, remains securely mounted, and integrates safely with the existing electrical system. Understanding how electricians install ceiling fans correctly highlights why professional methods matter, especially as modern fans become heavier and more electrically complex than older models.
From Wiring to Balance
- Evaluating Ceiling Structure and Support
Before any wiring begins, electricians assess whether the ceiling structure can safely support a ceiling fan. Fans are heavier than standard light fixtures and generate dynamic motion, increasing stress on the mounting points. Electricians check joists, braces, and ceiling boxes to confirm they are fan-rated and securely anchored. If the existing box is designed only for lighting, it is replaced with a reinforced option that can handle both weight and motion. This structural evaluation prevents long-term loosening and reduces the risk of the fan shifting over time. A solid foundation is essential for safe and stable fan operation.
- Preparing Electrical Connections Safely
Once structural support is confirmed, electricians focus on electrical preparation. Power is shut off at the panel, and existing wiring is inspected for damage, age, or improper connections. Electricians verify that wire gauges match the circuit requirements and that grounding is present and functional. During this stage, some electricians may consult installation guides or manufacturer documentation available on the company’s website to ensure compatibility with specific fan models. Proper preparation ensures the fan receives consistent power without overheating or causing circuit issues, creating a safe electrical foundation before installation proceeds.
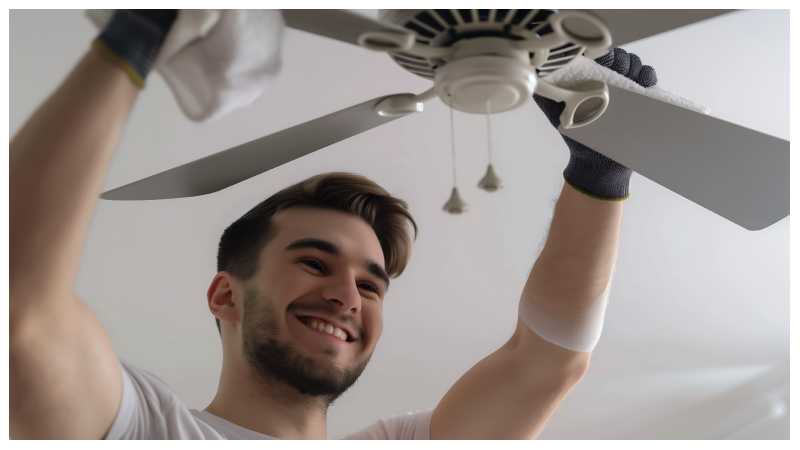
- Correct Fan Mounting Matters
The mounting bracket is a critical component that anchors the fan to the ceiling. Electricians attach this bracket directly to the fan-rated box or structural support, using approved hardware tightened to specification. A loose or improperly secured bracket can lead to wobbling or gradual detachment. Electricians ensure the bracket is level and firmly seated before hanging the fan motor. This step is essential for maintaining balance and preventing vibration.
- Assembling and Hanging the Fan Motor
Ceiling fan motors are heavy and must be handled carefully during installation. Electricians assemble components according to manufacturer guidelines, ensuring internal wiring is not pinched or stressed. When hanging the motor, they use temporary hooks or supports to avoid stressing the electrical connections. This controlled approach allows for precise alignment and secure attachment. Proper assembly ensures internal components remain protected and function as intended, reducing wear and electrical strain over time.
- Making Proper Wire Connections
Electrical connections within the fan canopy must be tight, organized, and properly enclosed. Electricians match wire colors, secure connections with approved connectors, and neatly arrange wiring to prevent contact with moving parts. Grounding wires are connected to both the fan and the ceiling box to ensure electrical safety. Loose or poorly arranged wires can cause flickering, overheating, or intermittent operation. Electricians verify that all connections are secure before closing the canopy, ensuring reliable power delivery.
- Installing Blades for Balance
Fan blades must be installed evenly to prevent wobble and uneven airflow. Electricians attach blades using manufacturer-specified screws and torque, ensuring each blade is aligned consistently. Even minor variations can create an imbalance at higher speeds. Electricians may measure blade height or spacing to confirm uniformity. Balanced blades improve performance, reduce noise, and minimize stress on the motor and mounting hardware. This attention to detail contributes to long-term reliability.
- Testing Fan Operation and Controls
After installation, electricians restore power and test the fan at all speed settings. They observe movement, listen for unusual sounds, and check for wobbles. Controls such as wall switches, pull chains, or remote systems are tested for proper function. Electricians confirm that direction settings work correctly for seasonal airflow adjustment. Testing ensures the fan operates smoothly and safely before the job is considered complete.
- Addressing Airflow and Placement Considerations
Proper installation also involves evaluating fan placement within the room. Electricians consider ceiling height, room size, and clearance from walls or furniture. Correct placement improves airflow efficiency and reduces the chance of airflow obstruction. In rooms with sloped ceilings, electricians use appropriate mounting kits to maintain safe angles and stable operation. Thoughtful placement enhances comfort and ensures the fan performs as intended.
- Ensuring Long-Term Stability
Electricians aim for installations that remain secure over time. They double-check fasteners, confirm canopy fit, and ensure no components are under tension. By following proper installation techniques, electricians reduce the likelihood of future adjustments or repairs. Long-term stability protects both the fan and the ceiling structure, supporting years of reliable use.
Correct ceiling fan installation involves far more than attaching a fixture to the ceiling. Electricians combine structural assessment, electrical safety, precise assembly, and thorough testing to ensure fans operate smoothly and securely. Their process reduces risks such as wobbling, electrical strain, and mechanical failure. Understanding how electricians install ceiling fans correctly highlights the importance of professional methods in achieving safe, efficient, and long-lasting performance.